
Hostinger GitLab VPS 模板使用教程
通过阅读本文,你将学习如何在 Hostinger 控制面板提供的**虚拟专用服务器(VPS)**上安装并配置 GitLab。我们将介绍访问 GitLab、初始管理员登录信息、更改 GitLab 域名以及关键的安全措施。
还没有购买 VPS 主机方案?请查看 GitLab VPS 主机方案。
要求
在开始安装 GitLab 之前,请确保你的 VPS 满足以下要求:
- VPS 主机方案:KVM2 或更高(KVM1 主机方案不支持 GitLab)
如果你目前使用的是 KVM1 主机方案,则需要升级到 KVM2 或更高版本才能使用 GitLab。
安装 GitLab 模板:
要选择此操作系统模板,请前往 Hostinger 控制面板中的 VPS 部分,并点击你要管理的服务器。
在侧边栏中,前往 OS & Panel → Operating System。选择 Applications,然后选择模板 GitLab,最后点击 Change OS:
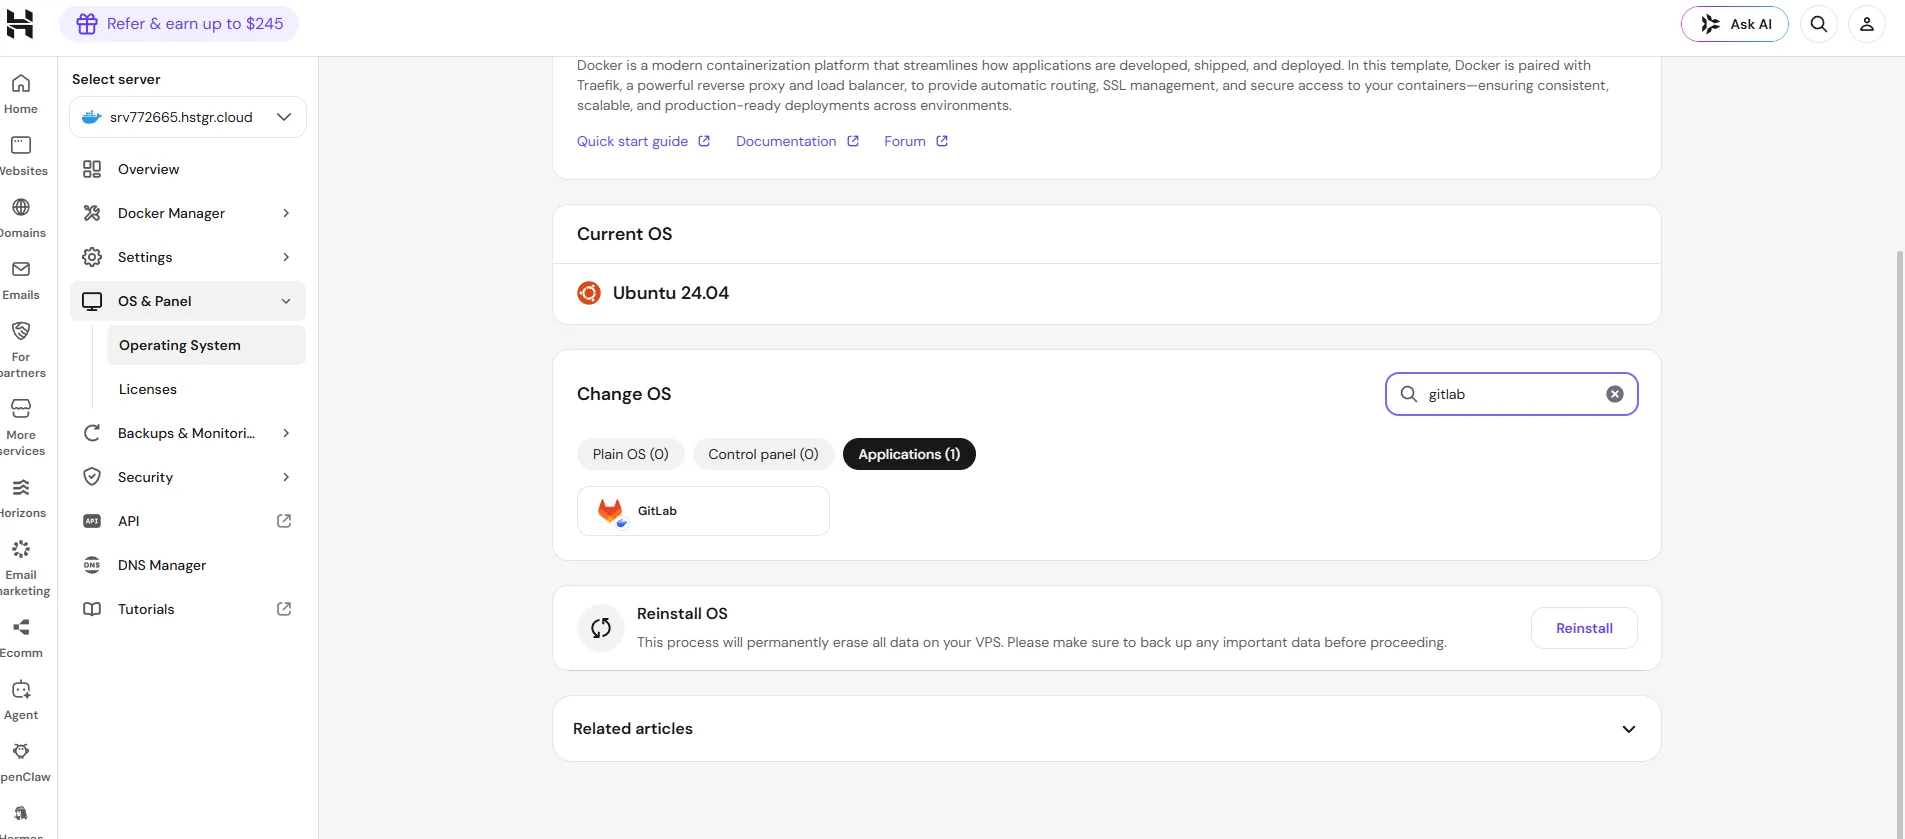
安装完成后,通过 Hostinger VPS 控制面板中提供的服务器 IP 或主机名访问 GitLab。
初始管理员登录信息
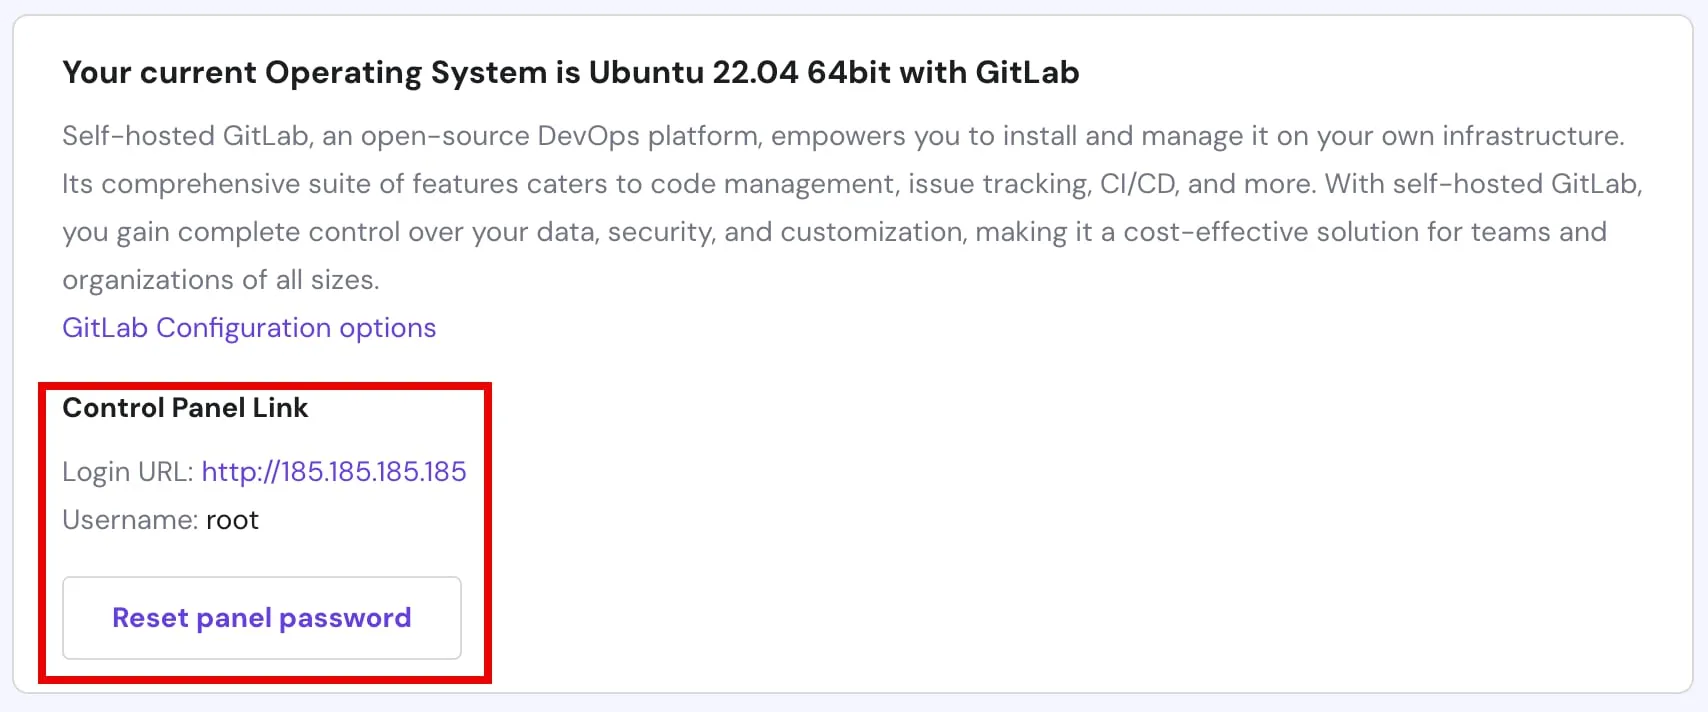
使用以下凭据访问 GitLab 管理面板:
- 用户名:root
- 密码:在安装操作系统时设置的密码;了解如何重置控制面板密码。
更改 GitLab 服务器域名
如果你希望 GitLab Enterprise 使用你的域名而不是服务器的主机名对外提供服务,请相应地编辑配置文件,然后运行重新配置命令。
首先,使用你喜欢的文本编辑器打开以下文件。本示例使用 vim:
vim /etc/gitlab/gitlab.rb打开文件后,搜索 external_url 这一行。它通常类似于以下内容,其中包含 http 协议和你的 IP 地址信息:
/etc/gitlab/gitlab.rb…## GitLab URL##! URL on which GitLab will be reachable.##! For more details on configuring external_url see:##! https://docs.gitlab.com/omnibus/settings/configuration.html#configuring-the>##!##! Note: During installation/upgrades, the value of the environment variable##! EXTERNAL_URL will be used to populate/replace this value.##! On AWS EC2 instances, we also attempt to fetch the public hostname/IP##! address from AWS. For more details, see:##! https://docs.aws.amazon.com/AWSEC2/latest/UserGuide/instancedata-data-retri>external_url 'http://domain.tld'之后,输入以下命令以应用更改:
gitlab-ctl reconfigure为 GitLab 服务器添加 SSL
更新最后一行,即 external_url 'http://domain.tld',将 http 改为 https,并填入你自己的域名。这样,你将自动受到 Let’s Encrypt 证书的保护:
/etc/gitlab/gitlab.rb…## GitLab URL##! URL on which GitLab will be reachable.##! For more details on configuring external_url see:##! https://docs.gitlab.com/omnibus/settings/configuration.html#configuring-the>##!##! Note: During installation/upgrades, the value of the environment variable##! EXTERNAL_URL will be used to populate/replace this value.##! On AWS EC2 instances, we also attempt to fetch the public hostname/IP##! address from AWS. For more details, see:##! https://docs.aws.amazon.com/AWSEC2/latest/UserGuide/instancedata-data-retri>external_url 'https://domain.tld'…接下来,你需要为 Let’s Encrypt 添加你的邮箱地址。找到 letsencrypt['contact_emails'] 行,删除井号 # 取消注释,然后填入你的信息:
/etc/gitlab/gitlab.rb…letsencrypt['contact_emails'] = ['name@example.tld']…完成这些更改后,保存并关闭文件。然后运行以下命令来重新配置 GitLab:
gitlab-ctl reconfigure大功告成!你已成功在 Hostinger 提供的 VPS 上搭建了自己的 GitLab 服务器。