
Hostinger AI Builder 预约连接 Google Calendar 教程
将 Google 日历连接到你的 Hostinger AI Builder 预约功能,可以让日程安排更轻松,确保你不会错过任何预约。同步完成后,所有新预约都会自动显示在你的 Google 日历中,让你的日程在所有设备上保持最新。
开始之前
请确保你具备以下条件:
- 已启用预约功能的网站
- 一个 Google 账户
如何连接 Google 日历
- 进入商店管理区域
- 选择 Appointments(预约)
- 前往 Settings(设置)
- 前往 Google 日历部分(Google Calendar section),点击 Connect(连接)。
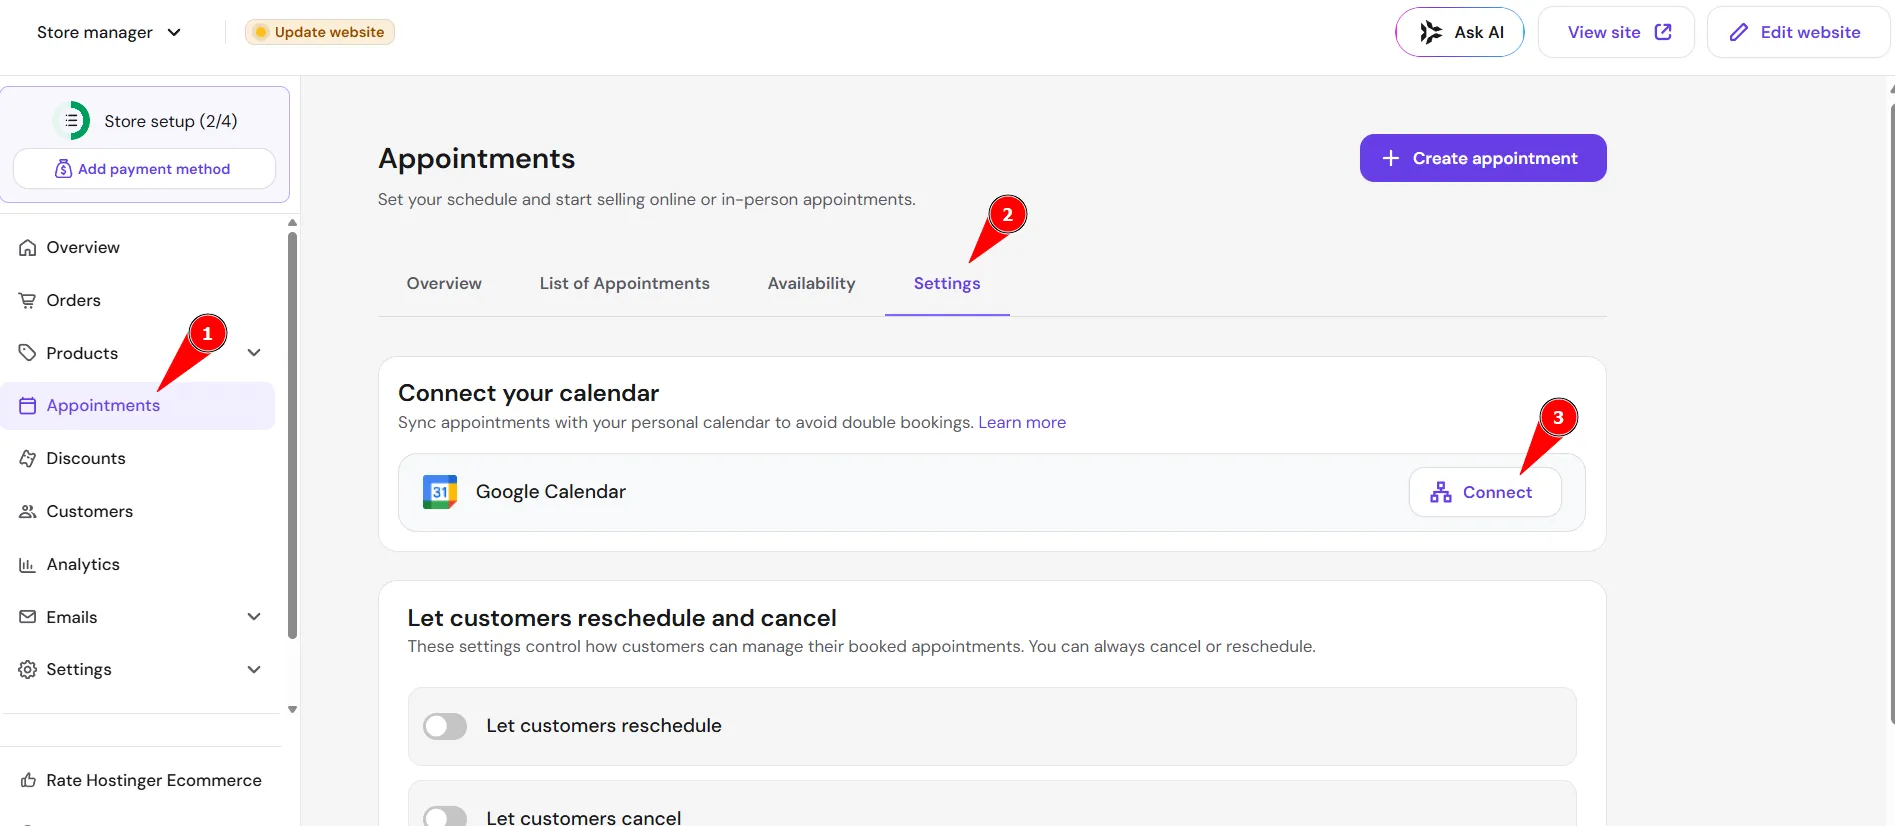
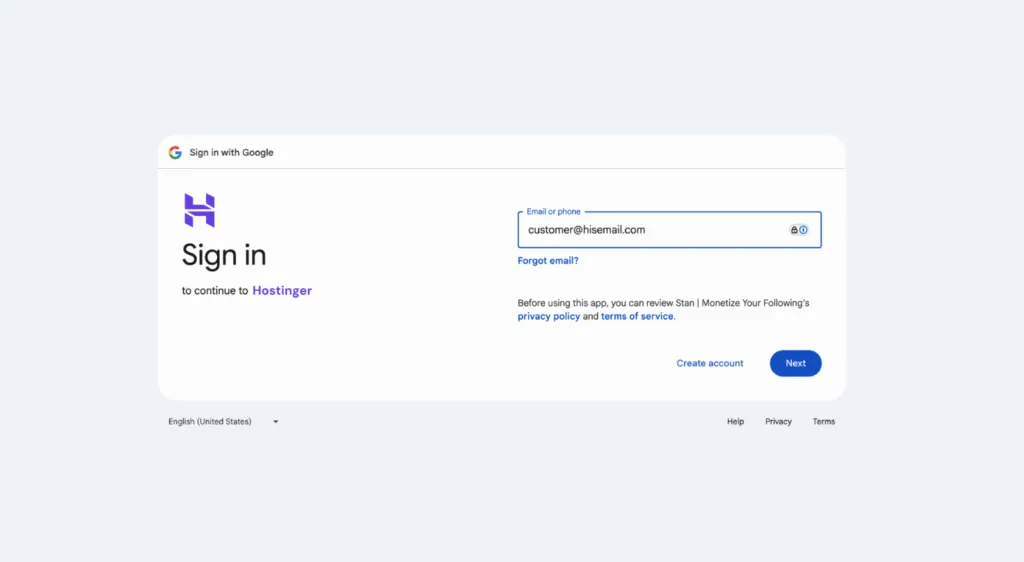
- 你将被重定向到 Google 身份验证页面。选择要与预约功能同步的 Google 账户。
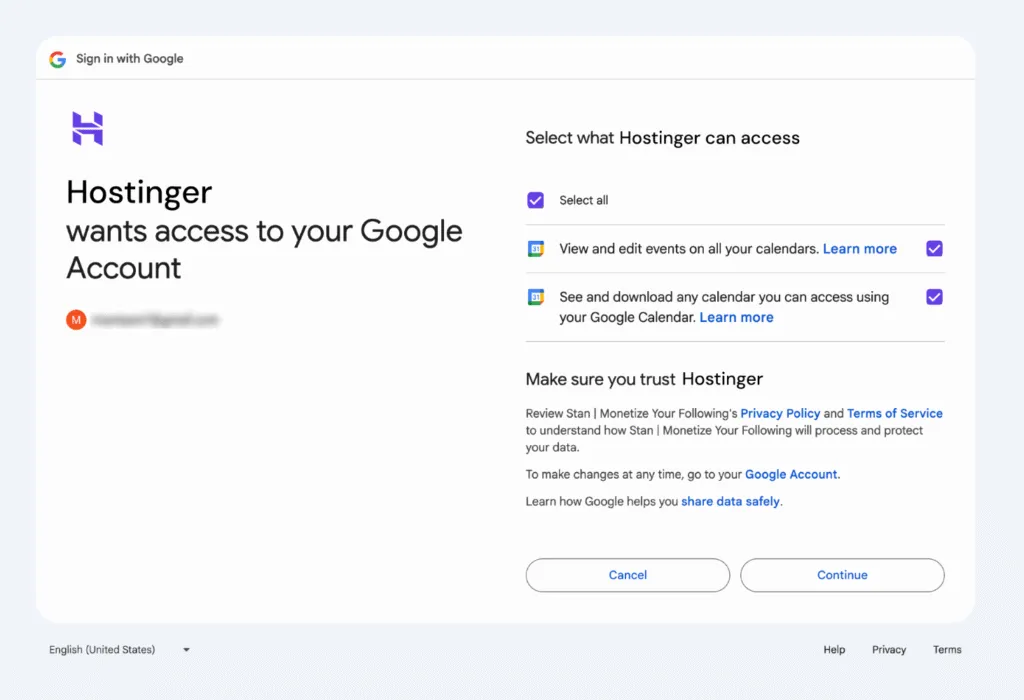
- 允许 AI Builder 查看你的日历并向其中添加活动。这是预约自动同步的必要条件。
- 授权后,你将被重定向回控制面板,届时你会看到该集成已标记为已连接(Connected)。
连接 Google 日历后会发生什么
连接完成后:
- 新预约会自动添加到你的 Google 日历中。
- 你可以在每个日历活动中查看预约详情(姓名、服务、时间、联系方式)。
- 直接在 Google 日历中所做的编辑不会更改 Hostinger AI Builder 内的预约。
- 已取消或重新安排的预约会自动更新。
如何断开 Google 日历
如果你想停止同步预约:
- 前往 Store Manager(商店管理器) → Appointments(预约)→ Settings(设置)
- 找到 Google Calendar(Google 日历),点击 Disconnect(断开连接)。
- 确认该操作。
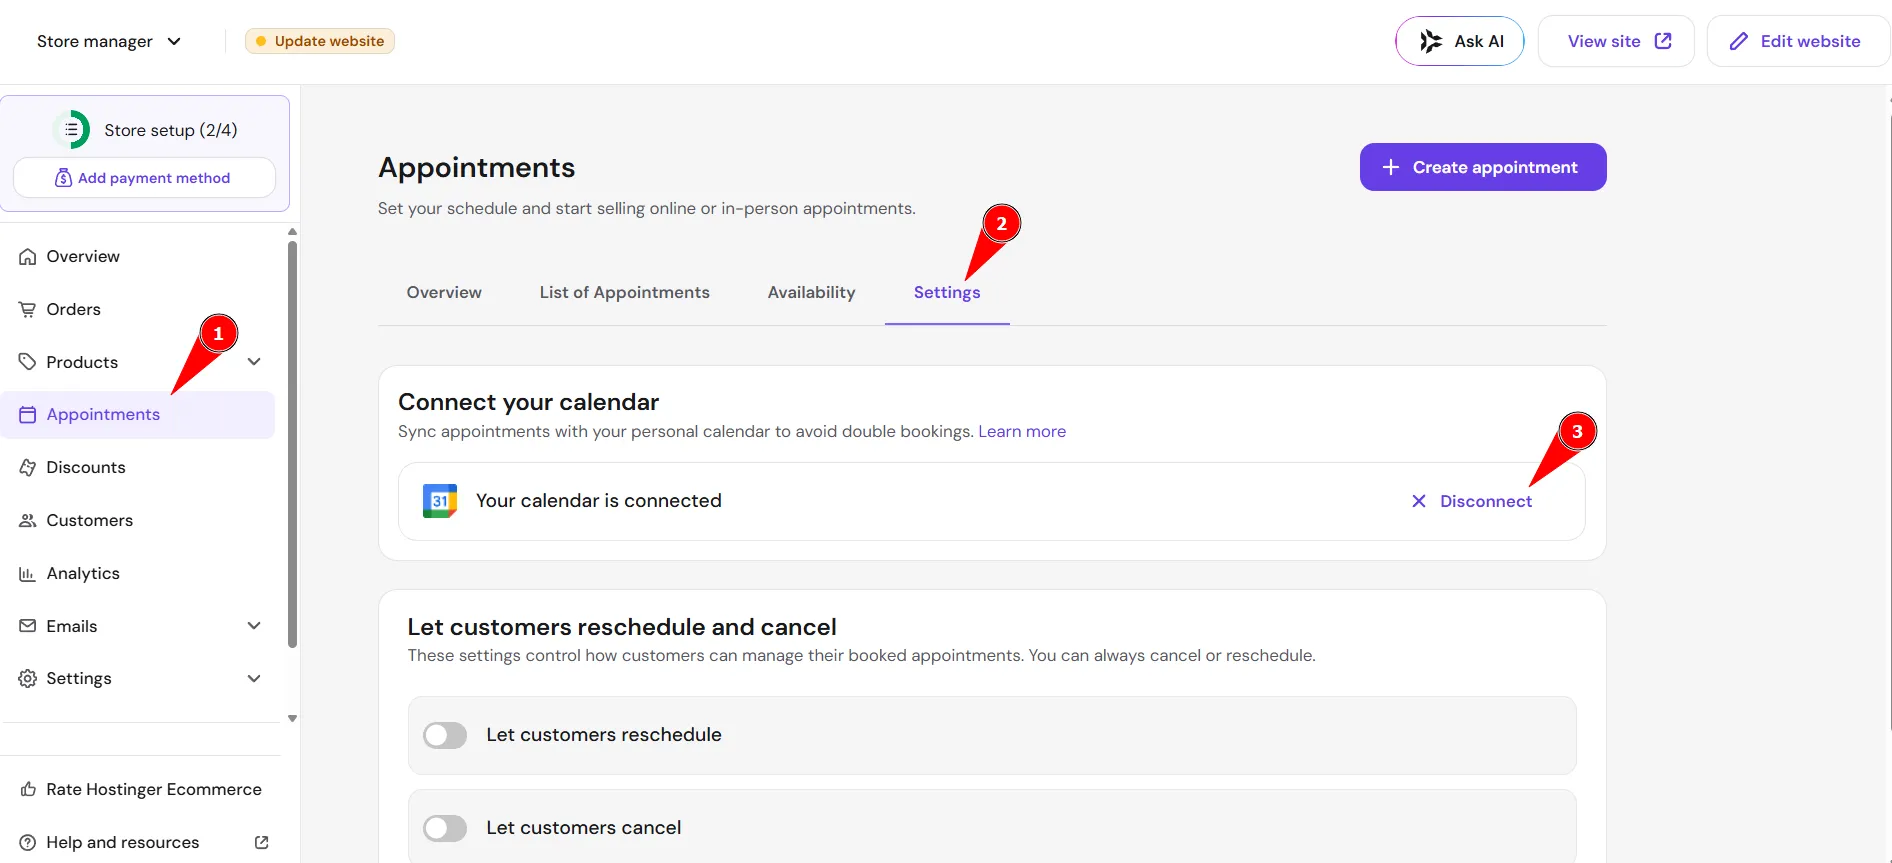
你的现有预约将保留,但新预约将不再同步。